Reading Time: 14 minutes
What is VPS Server
A virtual private server (VPS) is a type of hosting that allows a single physical server to be partitioned and used by multiple customers, each with their own operating system and resources. Each VPS operates as a standalone server but shares hardware and network resources with other VPSs on the same physical server. This allows hosting providers to offer the benefits of a dedicated server at a lower cost by using the same hardware to host multiple VPSs.
VPS hosting is a popular option for web developers, small businesses, and organizations that need more control over their hosting environment than what is offered with shared hosting, but don’t want to invest in a dedicated server. With a VPS, you have the ability to install custom software, configure the server to your specific needs, and have root access to the operating system. This gives you greater control and flexibility over your hosting environment but requires a higher level of technical expertise to manage.
Some common features of VPS hosting include:
- The ability to run multiple virtualized operating systems on a single physical server
- Dedicated resources such as CPU, memory, and storage allocated to each VPS
- The ability to install and customize software and applications
- The ability to configure the server to meet specific needs
- Root access to the operating system
- Isolation from other VPSs on the same physical server, ensuring greater security and performance
How to choose a VPS server for my website
There are a few factors to consider when choosing a VPS server for your website:
- Performance: The performance of your VPS server will depend on the hardware and resources allocated to it. Make sure to choose a server with enough CPU, RAM, and storage to meet the needs of your website.
- Operating system: VPS servers can be configured with a variety of operating systems, such as Linux or Windows. Choose the one that best meets the needs of your website and your technical expertise.
- Hosting provider: Consider the reputation and track record of the hosting provider you are considering. Look for a provider that offers reliable uptime, good customer support, and a range of hosting options to meet your needs.
- Pricing: VPS hosting tends to be more expensive than shared hosting, but less expensive than dedicated hosting. Determine your budget and look for a hosting plan that offers the resources and features you need at a price you can afford.
- Scalability: Consider whether you need a VPS server that can scale to meet the needs of your website as it grows. Some hosting providers offer scalable VPS hosting plans that allow you to add additional resources as needed.
- Security: Make sure to choose a hosting provider that takes security seriously and offers measures such as firewalls and secure data centers to protect your website.
By considering these factors, you can choose a VPS server that meets the needs of your website and provides the performance, reliability, and security you require.
How to connect your VPS on Putty Software
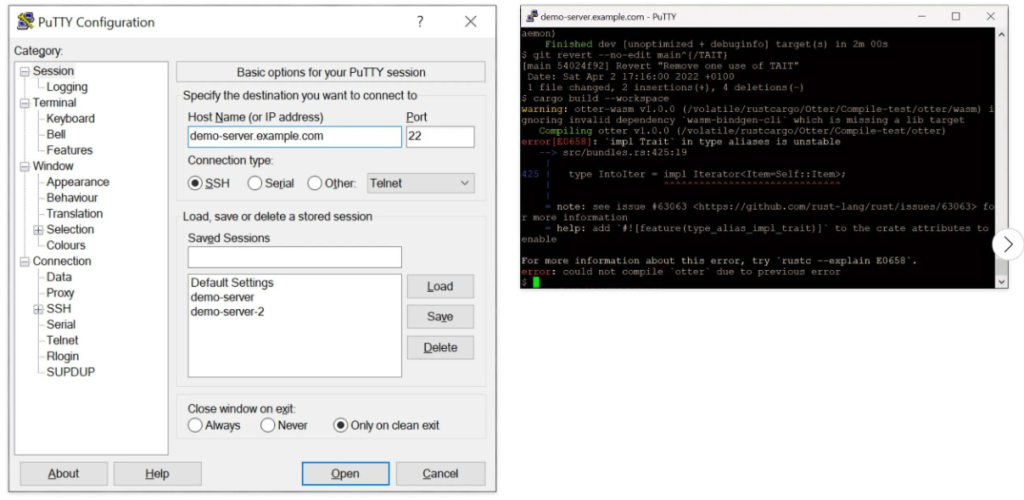
To connect to a VPS using Putty, you will need to follow these steps:
- Download and install Putty on your local computer.
- Open Putty and enter the IP address or hostname of your VPS in the “Host Name” field.
- Select the “SSH” option in the “Connection type” field.
- In the “Category” list on the left, expand the “Connection” category and select “Data”. In the “Auto-login username” field, enter the username that you use to log in to your VPS.
- In the “Category” list on the left, expand the “SSH” category and select “Auth”. Click the “Browse” button and select the private key file that you use to log in to your VPS.
- In the “Category” list on the left, expand the “Session” category and click the “Save” button. Enter a name for your session and click “Save”.
- Click the “Open” button to connect to your VPS. If this is your first time connecting to the VPS, you may see a security alert message. Click “Yes” to continue.
- When prompted, enter the passphrase for your private key file if you have one.
- You should now be logged in to your VPS via Putty.
Note: These steps assume that you have already configured your VPS to accept SSH connections and have a private key file that you use to log in. If you have not done these things, you may need to perform additional configuration steps before you can connect to your VPS using Putty.
VPS Server Control panel
A VPS control panel is a web-based interface that allows you to manage your VPS server and the services and applications running on it. A control panel can make it easier to perform common tasks such as setting up websites, creating email accounts, and managing databases.
There are many different control panels available for VPS servers, and the one you choose will depend on your hosting provider and the operating system of your VPS. Some common VPS control panels include:
- cPanel: cPanel is a popular control panel for Linux VPS servers. It offers a wide range of features and is user-friendly, making it a good choice for many website owners.
- Plesk: Plesk is a control panel that is available for both Linux and Windows VPS servers. It offers a wide range of features and is easy to use, making it a good choice for many website owners.
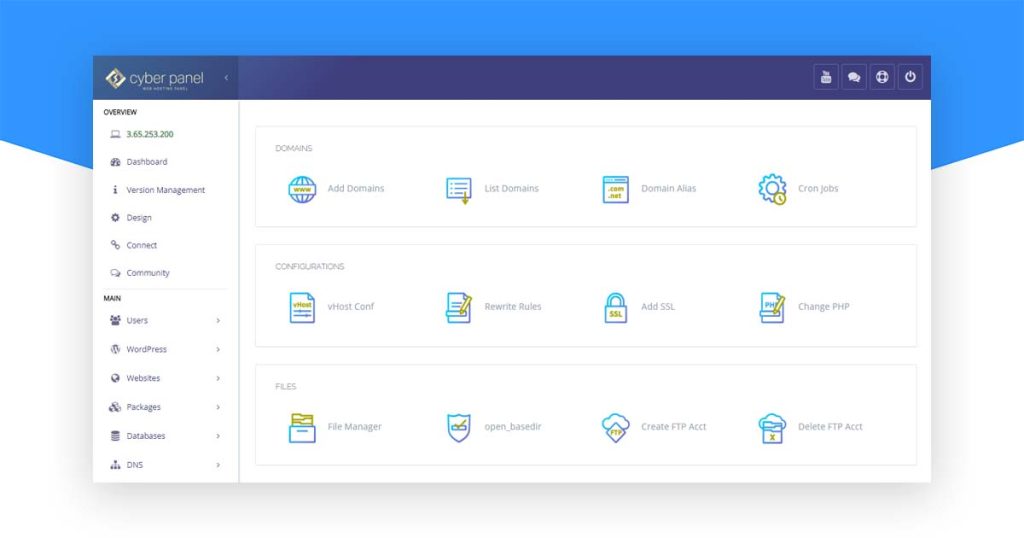
- Cyberpanel: CyberPanel Easy and Superfast Web Hosting control panel without the overhead of hiring a Linux admin and CyberPanel is the first open-source control panel that supports OpenLiteSpeed and LiteSpeed Enterprise.
- Webmin: Webmin is a free, open-source control panel that is available for Linux VPS servers. It offers a wide range of features and is user-friendly, making it a good choice for many website owners.
- aaPanel: aaPanel is an alternative of a Free web server control panel like cPanel and Plesk.
- CentOS Web Panel: CentOS Web Panel (CWP) is a web-based control panel for managing servers running the CentOS operating system.
When choosing a control panel for your VPS, consider the features and functionality that you need, as well as the level of technical expertise required to use it.
How to install cPanel on VPS
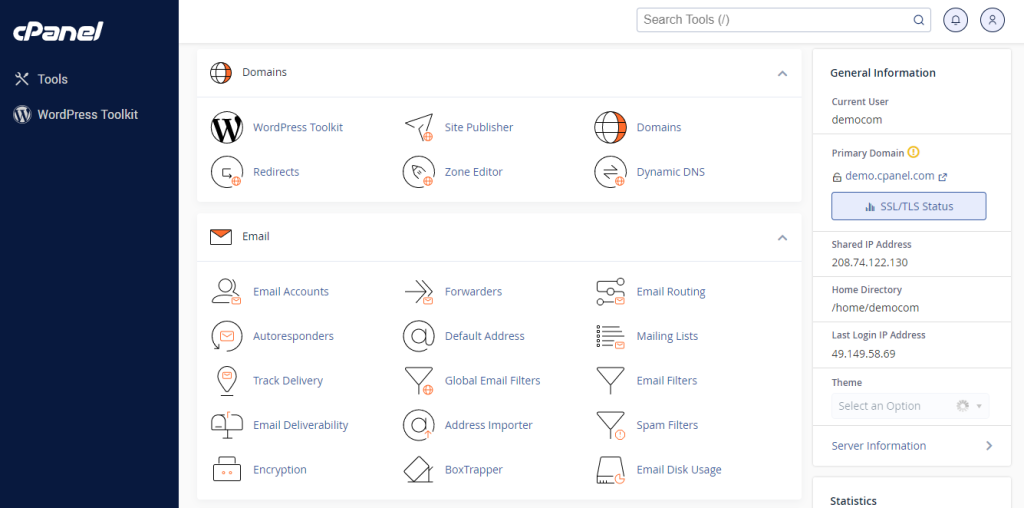
cPanel is a web-based control panel for managing web hosting servers. It provides a user-friendly interface for a wide range of server management tasks, such as creating and managing websites, databases, email accounts, and more. cPanel is designed to be easy to use and is suitable for both novice and experienced users. Some of the features it offers include:
- A web-based file manager for uploading and managing files on the server
- A database management tool for creating and managing databases using MySQL or MariaDB
- A tool for managing email accounts and forwarders
- A system monitor for tracking resource usage and performance
- A firewall manager for configuring the server’s firewall rules
cPanel is commercial software that is widely used by hosting providers and web developers to manage their servers. It is available for various operating systems, including Linux, Unix, and Windows.
To install cPanel on a VPS server, you will need to follow these steps:
- Purchase a cPanel license from a licensed cPanel reseller. You will need to choose a license based on the number of domains and accounts you need to host.
- Log in to your VPS server via SSH using a tool such as Putty.
- Run the following command to download the cPanel installation script:
wget -N http://httpupdate.cpanel.net/latest- Run the cPanel installation script using the following command:
sh latest
- The cPanel installation process will begin. This may take several hours to complete, depending on the resources of your VPS server.
- Once the installation is complete, you will be able to access cPanel by visiting the following URL in your web browser:
http://your-server-ip:2082
Replace “your-server-ip” with the IP address of your VPS server. You will be prompted to log in with the username and password that you created during the installation process.
Note: These steps assume that you are running a supported version of CentOS or Red Hat Enterprise Linux on your VPS. If you are running a different operating system, you may need to follow different steps to install cPanel.
How to install Plesk Control panel on VPS
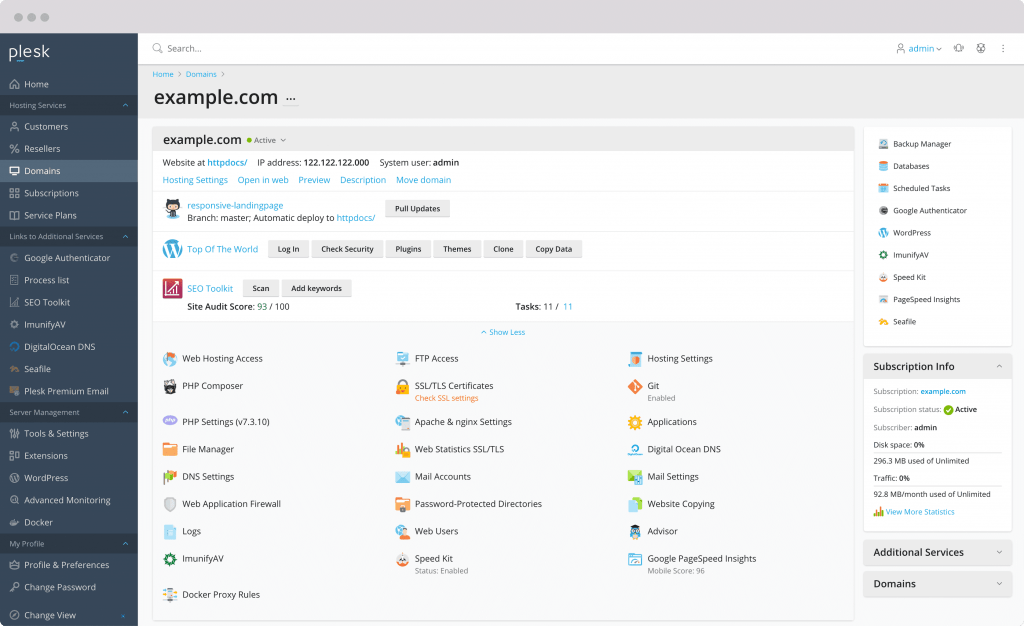
Plesk is a web-based control panel for managing web hosting servers. It provides a user-friendly interface for a wide range of server management tasks, such as creating and managing websites, databases, email accounts, and more. Plesk is designed to be easy to use and is suitable for both novice and experienced users. Some of the features it offers include:
- A web-based file manager for uploading and managing files on the server
- A database management tool for creating and managing databases using MySQL or MariaDB
- A tool for managing email accounts and forwarders
- A system monitor for tracking resource usage and performance
- A firewall manager for configuring the server’s firewall rules
Plesk is commercial software that is widely used by hosting providers and web developers to manage their servers. It is available for various operating systems, including Linux, Unix, and Windows.
To install Plesk on a VPS server, you will need to follow these steps:
- Purchase a Plesk license from a licensed Plesk reseller. You will need to choose a license based on the number of domains and accounts you need to host.
- Log in to your VPS server via SSH using a tool such as Putty.
- Download the Plesk installation script using the following command:
wget https://autoinstall.plesk.com/plesk-installer
- Run the Plesk installation script using the following command:
bash plesk-installer
- Follow the prompts to complete the installation process. This may take several hours to complete, depending on the resources of your VPS server.
- Once the installation is complete, you will be able to access Plesk by visiting the following URL in your web browser:
http://your-server-ip:8443
Replace “your-server-ip” with the IP address of your VPS server. You will be prompted to log in with the username and password that you created during the installation process.
Note: These steps assume that you are running a supported version of CentOS, Debian, or Ubuntu on your VPS. If you are running a different operating system, you may need to follow different steps to install Plesk.
How to Install CyberPanel on VPS
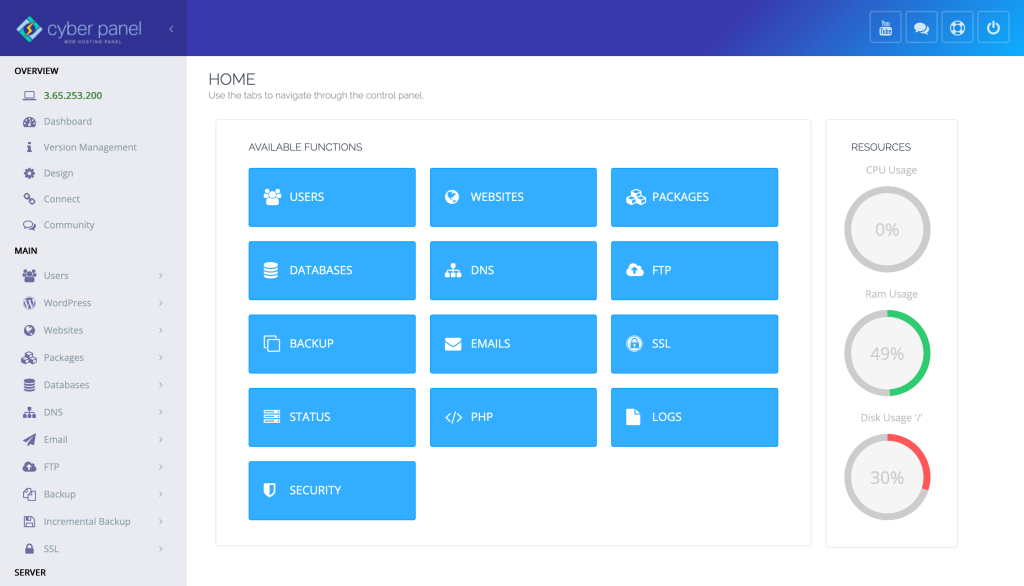
CyberPanel is a web-based control panel for managing web hosting servers. It is an open-source alternative to commercial control panels like cPanel and Plesk. CyberPanel provides a user-friendly interface for a wide range of server management tasks, such as creating and managing websites, databases, email accounts, and more. Some of the features it offers include:
- A web-based file manager for uploading and managing files on the server
- A database management tool for creating and managing databases using MySQL or MariaDB
- A tool for managing email accounts and forwarders
- A system monitor for tracking resource usage and performance
- A firewall manager for configuring the server’s firewall rules
CyberPanel is available for servers running the CentOS, CloudLinux, and OpenLiteSpeed operating systems. It is a popular choice for hosting providers and web developers who want an open-source alternative to commercial control panels.
To install Cyberpanel on a VPS server, you will need to follow these steps:
- Log in to your VPS server via SSH using a tool such as Putty.
- Download the Cyberpanel installation script using the following command:
wget https://cyberpanel.net/install.sh
- Make the installation script executable using the following command:
chmod +x install.sh
- Run the Cyberpanel installation script using the following command:
./install.sh
- Follow the prompts to complete the installation process. This may take several hours to complete, depending on the resources of your VPS server.
- Once the installation is complete, you will be able to access Cyberpanel by visiting the following URL in your web browser:
http://your-server-ip:8090
Replace “your-server-ip” with the IP address of your VPS server. You will be prompted to log in with the username and password that you created during the installation process.
Note: These steps assume that you are running a supported version of CentOS, Fedora, or Ubuntu on your VPS. If you are running a different operating system, you may need to follow different steps to install Cyberpanel.
How to install aaPanel on VPS
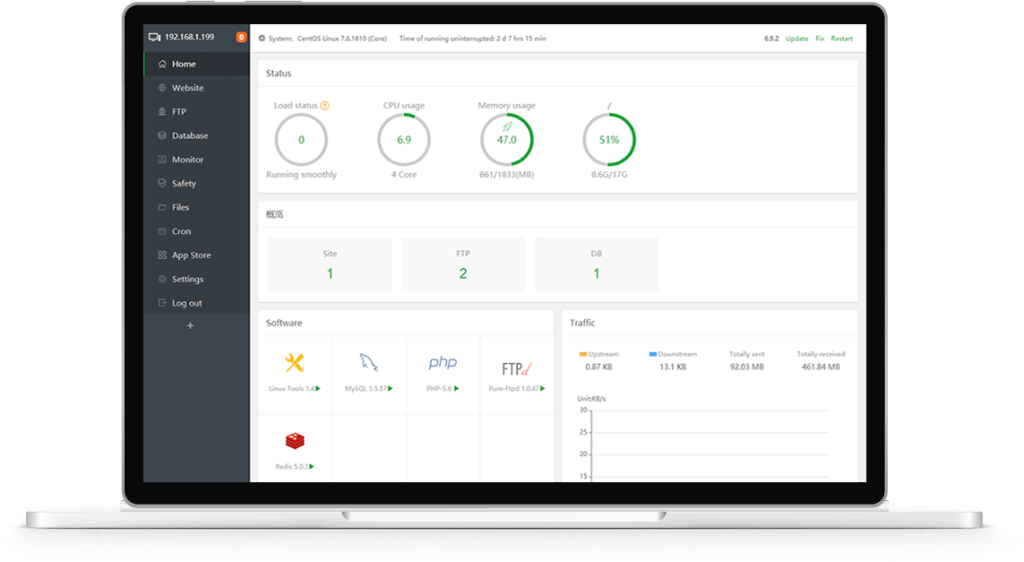
Aapanel is a web-based control panel for managing web hosting servers. It is an open-source alternative to commercial control panels like cPanel and Plesk. Aapanel provides a user-friendly interface for a wide range of server management tasks, such as creating and managing websites, databases, email accounts, and more. Some of the features it offers include:
- A web-based file manager for uploading and managing files on the server
- A database management tool for creating and managing databases using MySQL or MariaDB
- A tool for managing email accounts and forwarders
- A system monitor for tracking resource usage and performance
- A firewall manager for configuring the server’s firewall rules
Aapanel is available for servers running the CentOS and Ubuntu operating systems. It is a popular choice for hosting providers and web developers who want an open-source alternative to commercial control panels.
To install aapanel on a VPS server, you will need to follow these steps:
- Log in to your VPS server via SSH using a tool such as Putty.
- Download the aapanel installation script using the following command:
wget -O install.sh http://www.aapanel.com/script/install-ubuntu.sh
- Make the installation script executable using the following command:
chmod +x install.sh
- Run the aapanel installation script using the following command:
./install.sh
- Follow the prompts to complete the installation process. This may take several hours to complete, depending on the resources of your VPS server.
- Once the installation is complete, you will be able to access aapanel by visiting the following URL in your web browser:
http://your-server-ip:8888
Replace “your-server-ip” with the IP address of your VPS server. You will be prompted to log in with the username and password that you created during the installation process.
Note: These steps assume that you are running a supported version of Ubuntu on your VPS. If you are running a different operating system, you may need to follow different steps to install aapanel.
How to install Webmin on VPS
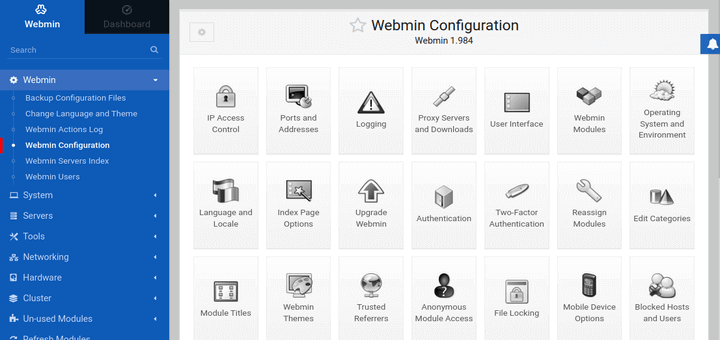
Webmin is a web-based control panel for managing Unix-like systems, such as Linux and BSD. It provides a user-friendly interface for a wide range of server management tasks, such as creating and managing users, configuring network settings, and installing and upgrading software. Webmin is designed to be easy to use and is suitable for both novice and experienced users. Some of the features it offers include:
- A system monitor for tracking resource usage and performance
- A tool for managing user accounts and groups
- A module for configuring network settings, such as interfaces, firewalls, and DNS servers
- A module for managing web servers, such as Apache and Nginx
- A module for managing databases, such as MySQL and PostgreSQL
- A module for managing email servers, such as Sendmail and postfix
Webmin is free and open-source software that is available for various operating systems, including Linux, BSD, and Solaris. It is a popular choice for system administrators who want a web-based interface for managing their servers.
To install Webmin on a VPS server, you will need to follow these steps:
- Log in to your VPS server via SSH using a tool such as Putty.
- Download and install the Webmin repository configuration file using the following commands:
wget http://www.webmin.com/jcameron-key.asc apt-key add jcameron-key.asc- Add the Webmin repository to your system’s list of repositories using the following command:
echo "deb http://download.webmin.com/download/repository sarge contrib" >> /etc/apt/sources.list
- Update your system’s package list using the following command:
apt-get update
- Install Webmin using the following command:
apt-get install webmin
- Once the installation is complete, you will be able to access Webmin by visiting the following URL in your web browser:
http://your-server-ip:10000
Replace “your-server-ip” with the IP address of your VPS server. You will be prompted to log in with the username and password of a user on your VPS with administrative privileges.
Note: These steps assume that you are running a supported version of Debian or Ubuntu on your VPS. If you are running a different operating system, you may need to follow different steps to install Webmin.
How to install CenOs Web Panel ( CWP ) on VPS
CentOS Web Panel (CWP) is a web-based control panel for managing servers running the CentOS operating system. It provides a user-friendly interface for managing various aspects of a server, such as creating and managing websites, databases, email accounts, and more. CWP is designed to be easy to use and is suitable for both novice and experienced users. Some of the features it offers include:
- Easy installation and configuration of popular web server software, such as Apache and Nginx
- A web-based file manager for uploading and managing files on the server
- A database management tool for creating and managing databases using MySQL or MariaDB
- A tool for managing email accounts and forwarders
- A system monitor for tracking resource usage and performance
- A firewall manager for configuring the server’s firewall rules
CWP is free and open-source software that is available to download and install on servers running CentOS. It is a popular choice for hosting providers and web developers who want to easily manage their servers.
To install CentOS Web Panel (CWP) on a VPS server, you will need to follow these steps:
- Log in to your VPS server via SSH using a tool such as Putty.
- Download the CWP installation script using the following command:
wget http://centos-webpanel.com/cwp-latest
- Make the installation script executable using the following command:
chmod +x cwp-latest
- Run the CWP installation script using the following command:
./cwp-latest
- Follow the prompts to complete the installation process. This may take several hours to complete, depending on the resources of your VPS server.
- Once the installation is complete, you will be able to access CWP by visiting the following URL in your web browser:
http://your-server-ip:2030
Replace “your-server-ip” with the IP address of your VPS server. You will be prompted to log in with the username and password that you created during the installation process.
Note: These steps assume that you are running a supported version of CentOS on your VPS. If you are running a different operating system, you may need to follow different steps to install CWP.
How to install Vesta Control Panel on VPS
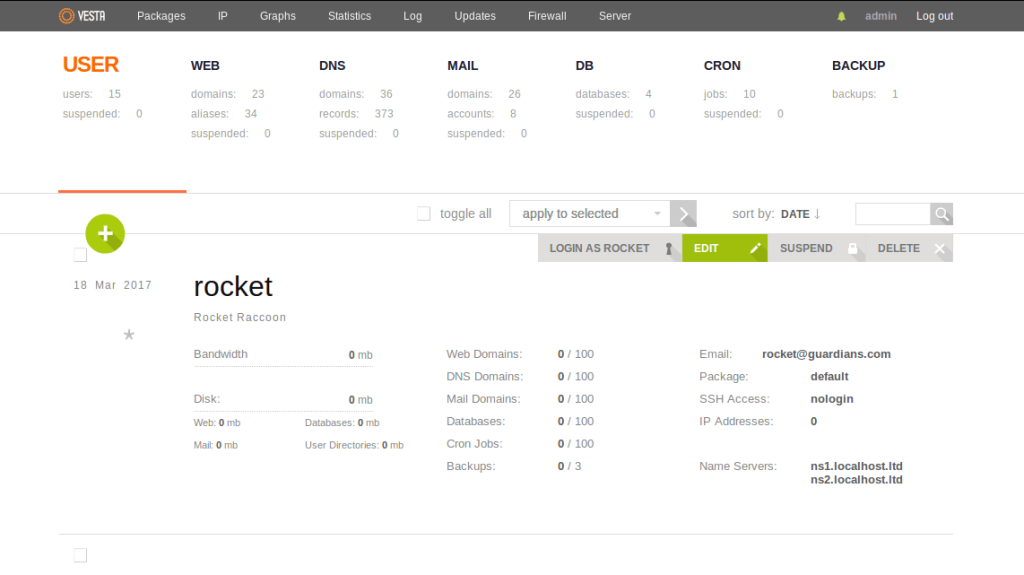
Vesta Control Panel is a web-based control panel for managing web hosting servers. It is an open-source alternative to commercial control panels like cPanel and Plesk. Vesta Control Panel provides a user-friendly interface for a wide range of server management tasks, such as creating and managing websites, databases, email accounts, and more. Some of the features it offers include:
- A web-based file manager for uploading and managing files on the server
- A database management tool for creating and managing databases using MySQL or MariaDB
- A tool for managing email accounts and forwarders
- A system monitor for tracking resource usage and performance
- A firewall manager for configuring the server’s firewall rules
Vesta Control Panel is available for servers running the CentOS and Debian operating systems. It is a popular choice for hosting providers and web developers who want an open-source alternative to commercial control panels.
To install Vesta Control Panel (VestaCP) on a VPS server, you will need to follow these steps:
- Log in to your VPS server via SSH using a tool such as Putty.
- Download the VestaCP installation script using the following command:
curl -O http://vestacp.com/pub/vst-install.sh
- Make the installation script executable using the following command:
chmod +x vst-install.sh
- Run the VestaCP installation script using the following command:
./vst-install.sh
- Follow the prompts to complete the installation process. This may take several hours to complete, depending on the resources of your VPS server.
- Once the installation is complete, you will be able to access VestaCP by visiting the following URL in your web browser:
http://your-server-ip:8083
Replace “your-server-ip” with the IP address of your VPS server. You will be prompted to log in with the username and password that you created during the installation process.
Note: These steps assume that you are running a supported version of CentOS or Debian on your VPS. If you are running a different operating system, you may need to follow different steps to install VestaCP.
How to Secure Your VPS Server
There are several steps you can take to secure your VPS server:
- Keep your operating system and software up to date: Make sure to regularly update your operating system and the software running on your VPS, including any control panels or applications. These updates often include security patches that can help protect against vulnerabilities.
- Use strong passwords: Use strong, unique passwords for all accounts on your VPS, including the root user and any control panel accounts. Avoid using easily guessable passwords or reusing passwords across different accounts.
- Enable two-factor authentication: Consider enabling two-factor authentication for any accounts on your VPS that support it. This adds an extra layer of security by requiring a second form of authentication, such as a code sent to your phone, in addition to a password.
- Use a firewall: Install and configure a firewall on your VPS to help protect against unauthorized access. A firewall can be configured to allow only specific incoming connections and block others.
- Monitor logs: Regularly monitor logs on your VPS, including system logs and access logs for any control panels or applications, to look for any unusual activity or attempts at unauthorized access.
- Use SSL/TLS: Use SSL/TLS certificates to encrypt traffic between your VPS and clients. This can help protect against the interception of sensitive data, such as passwords and credit card numbers.
By following these steps, you can help secure your VPS and protect against potential threats. It is important to regularly review and update your security measures to ensure that they remain effective.
